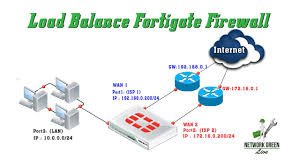
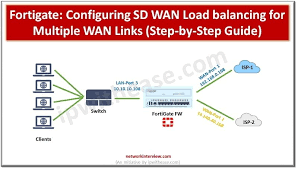
How to configure load balancer in fortigate firewall
Configuring a load balancer in a FortiGate firewall involves enabling the “Load Balance” feature in System > Feature Visibility, then defining a Virtual Server under Policy & Objects to act as the public-facing IP. You must assign a load-balancing method (e.g., Round Robin), add real servers with their IP addresses, configure a health check, and finally, create a firewall policy to permit traffic to the virtual server.
Steps to Configure Load Balancer (Server Load Balancing)
- Enable Feature Visibility: Go to System > Feature Visibility and enable Load Balance under Additional Features.
- Create Health Check (Optional but Recommended): Go to Policy & Objects > Health Check to define how the FortiGate checks if real servers are alive (e.g., TCP port 80 or Ping).
- Configure Virtual Server:
- Go to Policy & Objects > Virtual Servers and click Create New.
- Name: Give the virtual server a name.
- Type: Select HTTP, HTTPS, TCP, or UDP based on the service.
- Interface: Select the external-facing interface.
- Virtual IP Address: The IP address clients will connect to.
- Virtual Port: The port clients will use.
- Algorithm: Choose a method like Round Robin (equal distribution) or Least Session.
- Real Servers: Click Create New to add internal server IPs and ports.
- Create Firewall Policy:
- Go to Policy & Objects > Firewall Policy and click Create New.
- Set Incoming Interface to WAN/External and Outgoing Interface to Internal.
- Set Destination to the Virtual Server created in step 3.
- Ensure the Policy is set to Proxy-based inspection if necessary for the virtual server to work correctly.
Key Considerations
- Virtual Servers vs. VIPs: Use Virtual Servers for load balancing, not standard Virtual IPs (VIPs).
- Methodology: Options include Round Robin, Weighted, Least Session, and Least Round Trip Time.
- Persistence: You can configure session persistence (e.g., source IP) to ensure clients stay connected to the same server