How to Configure AD DS on Your Windows Server
Configuring an Active Directory (AD) server in Windows Server 2019 is a two-stage process: first, you install the Active Directory Domain Services (AD DS) role, and then you promote the server to a Domain Controller (DC).
Prerequisites
Before starting, ensure your server meets these vital requirements:
- Static IP Address: A DC must have a fixed IP. (Go to Network Connections > Ethernet Properties > IPv4 properties).
- Administrator Account: Ensure you are logged in with a local administrator account that has a strong password.
- Server Name: Rename your server to something meaningful (e.g.,
DC01) before starting, as changing it later is difficult.
Step 1: Install the AD DS Role
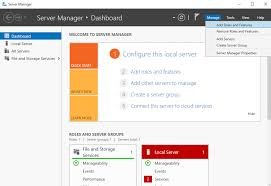
- Open Server Manager (it usually opens automatically at startup).
- Click Manage in the top-right corner and select Add Roles and Features.
- In the Wizard, click Next through the “Before You Begin” and “Installation Type” (choose Role-based or feature-based) sections.
- On the Server Selection screen, ensure your local server is selected and click Next.
- On the Server Roles list, check the box for Active Directory Domain Services.
- A popup will appear; click Add Features to include the necessary management tools.
- Click Next through the “Features” and “AD DS” information screens.
- On the Confirmation screen, click Install. Once finished, click Close.
Step 2: Promote the Server to a Domain Controller
After the role is installed, you must configure the domain.
- In Server Manager, click the Notifications (Flag) icon at the top and select Promote this server to a domain controller.
- Deployment Configuration: Select Add a new forest (if this is your first server). Enter a “Root domain name” (e.g.,
corp.yourcompany.comorinternal.local). - Domain Controller Options: * Leave the Forest/Domain functional levels at Windows Server 2016 (this is the highest level available for 2019).
- Ensure DNS Server and Global Catalog (GC) are checked.
- Set a DSRM Password (Directory Services Restore Mode). Save this password securely; you’ll need it for disaster recovery.
- DNS Options: You may see a warning about “DNS delegation.” This is normal for a new forest; just click Next.
- Additional Options: Verify the NetBIOS name (usually your domain name prefix) and click Next.
- Paths: Keep the default locations for the Database, Log files, and SYSVOL unless your organization requires otherwise.
- Prerequisites Check: The system will verify your setup. If you see a green checkmark at the top stating “All prerequisite checks passed,” click Install.
Step 3: Verification
The server will automatically restart. Once it reboots:
- Log in: You will now see your domain name (e.g.,
CORP\Administrator). - Check Tools: In Server Manager, go to Tools. You should now see Active Directory Users and Computers and DNS management consoles.
- Command Test: Open Command Prompt and type
dcdiag. This runs a battery of tests to ensure the DC is healthy.