How to configure aruba access point
Aruba access point configuration typically involves connecting the AP to a PoE switch, identifying its DHCP-assigned IP, logging into the web interface (default: admin/serial number), setting a new password, and configuring SSIDs via the Instant UI or Aruba Central. Initial setup requires setting the country code and updating firmware.
Initial Setup Steps
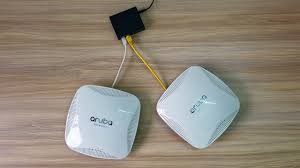
- Physical Connection: Connect the AP to a network switch or router using an Ethernet cable. The device will typically receive an IP address via DHCP.
- Access Management Interface:
- Find the AP’s IP address using network scanning software (e.g., Angry IP Scanner) or check DHCP server logs.
- Open a web browser, enter the IP address, and log in.
- Default Credentials: Username:
admin; Password:<serial number of the device>.
- Basic Configuration: Upon first login, set a new, strong admin password. Configure the country code to comply with local regulations.
- Network Setup: Create a new wireless network (SSID), define security settings (e.g., WPA3-Personal), and configure VLANs if necessary.
Configuration Methods
- Aruba Instant (IAP) UI: Best for small to medium, site-specific deployments. Access via local IP to manage SSIDs, security, and radio settings directly.
- Aruba Central (Cloud): Ideal for managing multiple, distributed APs. Uses group-level settings to push configurations (WLAN, security, radio) to devices.
- CLI: Advanced, command-line interface configuration for granular control.
This video shows how to configure an Aruba Instant AP:
Key Configuration Areas
- WLAN/SSID: Set up network names, VLAN assignments, and client IP addressing (DHCP or bridge mode).
- Security: Configure WPA3-Personal, WPA3-Enterprise, or Guest portals with captive portal capabilities.
- Radio Settings: Manage radio power and channel settings, which can be left at default for initial deployment.
Watch this video for a demonstration of how to configure an Aruba access point: